|
Looking for a tutorial showing you how to install WordPress, but keep finding resources that tackle every method except the one you need? We’ve got your back. In this post, we break down every conceivable way there is to install WordPress. You’ll learn how to install WordPress using cPanel, Softaculous, MOJO, Fantastico, and QuickInstall; locally on both Windows and Mac; manually using FTP; and we’ll break down popular hosting providers like GoDaddy, Bluehost, and HostGator. You’ll also learn how to install WordPress Multisite, how to install WordPress in different languages, and more. Just click the appropriate link in our Table of Contents to jump to the section you need. Ready? Let’s go. Table of Contents
How to Install WordPress on cPanel (Softaculous, MOJO, Fantastico, and QuickInstall)So, you decided to start a blog. Awesome. Now it’s time to roll up your sleeves and get to work installing WordPress. Thankfully, many of the popular WordPress hosts offer some form of simplified (or even automatic) installation. If you’re using a “shared†WordPress hosting plan, there’s a good chance your host will use cPanel.
Editor’s Note: cPanel is an online control panel many web hosts use to simplify the whole “how to host a website†thing for users. Go here to learn more about it.
Let’s walk through the cPanel process… Step #1. Find Out How to Access Your Host’s cPanelUnfortunately, the way you get to cPanel is not standardized across the web. Different hosts access it differently. So, before you can do anything, you need to find out how to access your host’s cPanel. The easiest method is to find the emails your hosting provider sent you when you signed up for your account. Among other valuable bits of information, the URL to your cPanel will be in one of those initial emails. But if you can’t find the right email, don’t worry. Just Google the name of your web host and “cPanel loginâ€. That should do the trick. Step #2. Get to Know cPanelThe main cPanel dashboard can be a little intimidating. 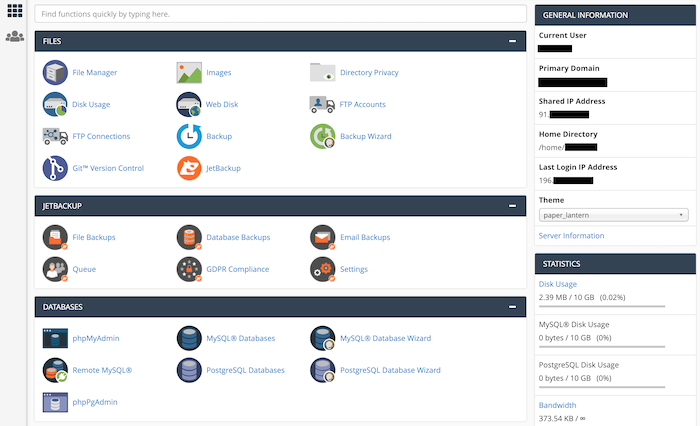 Relax. You don’t have to understand all cPanel has to offer. We’re here to do one thing — learn how to install WordPress. For that, let’s look for the cPanel installer tools, which are usually located near the bottom of the page. Your host might be using any of the following installers: Softaculous, Fantastico, QuickInstall, or MOJO Marketplace. We’re going to focus on Softaculous since it’s the most popular. But don’t worry if your host uses a different installer. While the specific interfaces might be a bit different, the idea behind every installer is the same. Plus, they all ask you for the same set of data and inputs. Step #3. How to Install WordPress Using SoftaculousTo begin, look for the Softaculous section in cPanel.  Click on the WordPress logo. The installer tool will open: Click on the Install Now button to begin the installation process. Softaculous needs only a handful of details from you. Here are the fields you should pay special attention to:
Here’s what the form looks like: 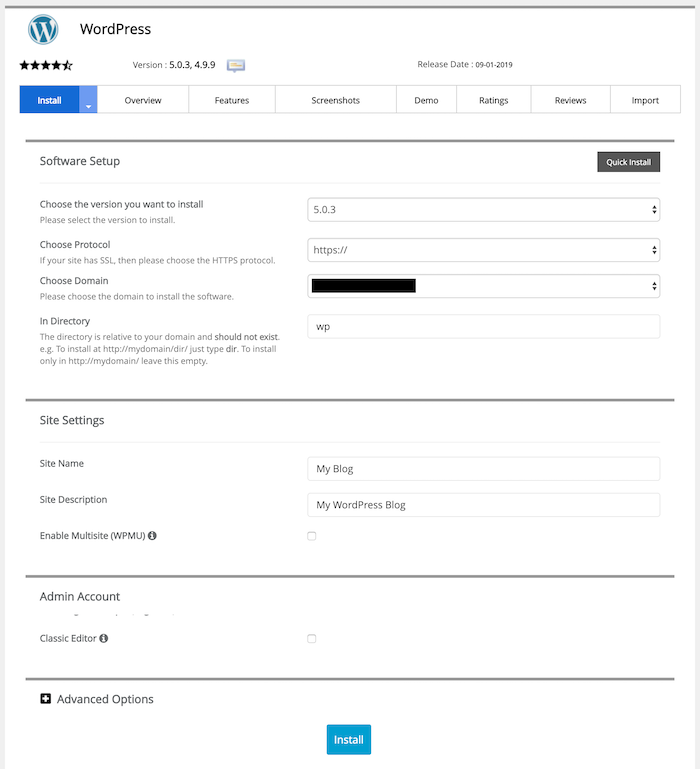 Click Install to proceed. When the process finishes, Softaculous will show you a final confirmation screen along with links to your WordPress dashboard. And that’s it! You’ve installed WordPress using cPanel.
Note: The WordPress dashboard of your newly-installed site should be available at yoursite.com/wp-admin/.
How to Install WordPress on Localhost (Or, How to Install WordPress Locally)The instructions for how to install WordPress locally depends on whether you’re using a PC (Windows) or a Mac. We’ll go over both methods. First up: Windows. (If you’re on a Mac, click here to jump ahead.) How to Install WordPress on WindowsWordPress is a great tool for local web development. Here’s how you install WordPress locally on Windows: Step #1. Get XAMPPXAMPP is a local web server for your computer. It’s an all-in-one package with everything you will need to run software (such as WordPress) locally.
What About WAMP?
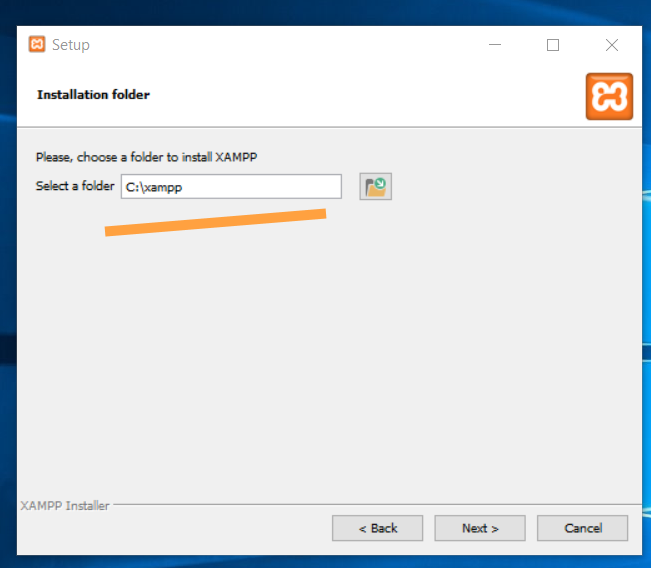
You might have heard of a similar tool called WAMP. Under the hood, WAMP and XAMPP do the same thing. However, in my opinion, WAMP isn’t as reliable as XAMPP. For this reason and others, we’ll focus on XAMPP in this tutorial. 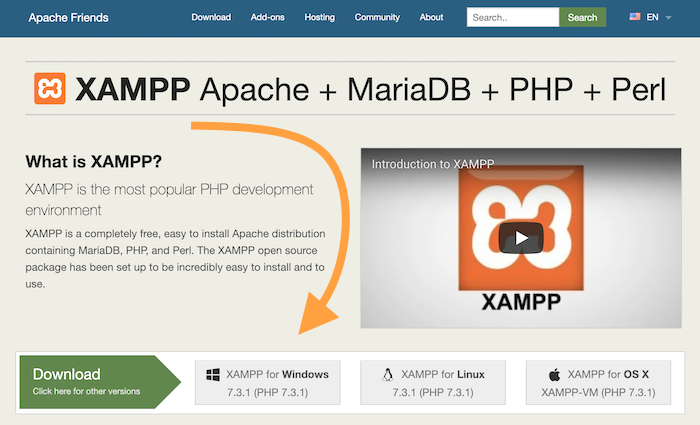 From the XAMPP website, click on the download button for Windows and save the XAMPP package to your desktop. Launch the XAMPP installer and follow the prompts on the screen. First, select the individual components you want to have installed. To be safe, you can choose all of them: 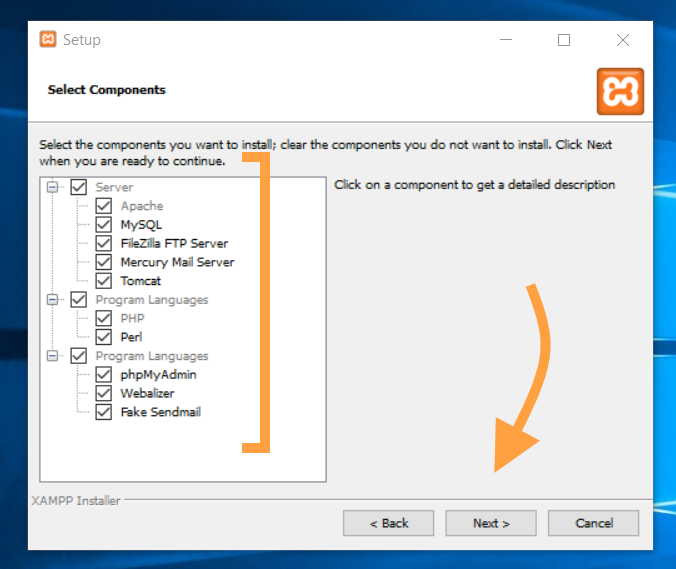 Next, select the installation folder for XAMPP.
Note: Avoid installing XAMPP in Program Files. The read/write restrictions of Windows might prevent it from working correctly. Installing in C:\xampp is a safer bet.
 XAMPP will take a minute or two to install. When it’s finished, you’ll see this confirmation screen: 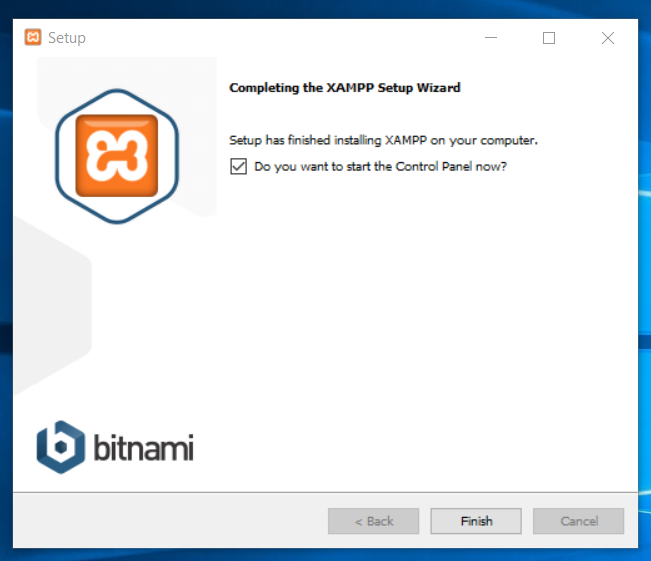 When you click on Finish, you’ll see the main XAMPP config panel. In it, click on the two Start buttons next to Apache and MySQL. Like so:  You should see the two labels change to green: 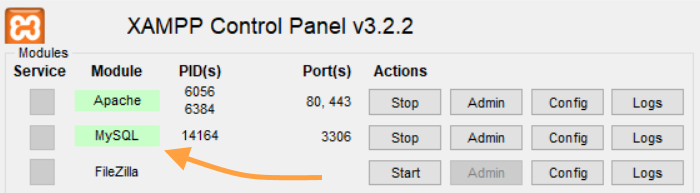 When you see green, your local server is working! Step #2. Create a Blank Database for WordPressFrom the control panel of XAMPP, click on the Admin button in the MySQL row:  This will launch a tool called PHPMyAdmin, which is an open-source database management tool. 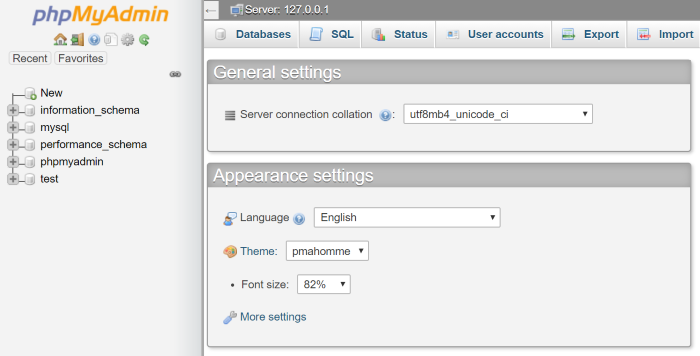 Go into Databases (from the top menu).  Enter a name for your new WordPress database (something simple) and click the Create button: 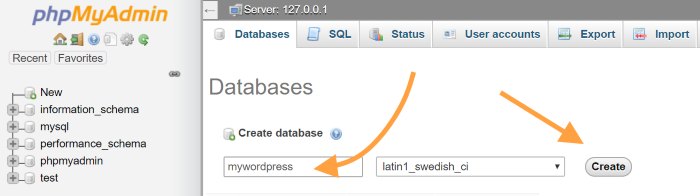 You should see your new blank database in the sidebar: 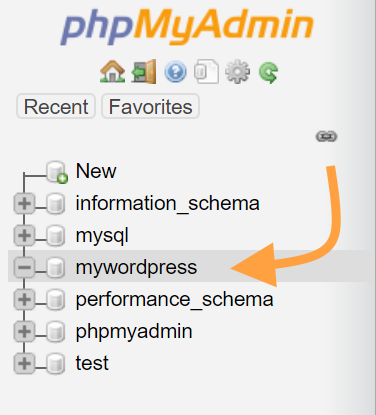 You can now exit PHPMyAdmin. Step #3. Download WordPressGo toWordPress.org and download the most recent version of the software. Don’t worry. It’s free: 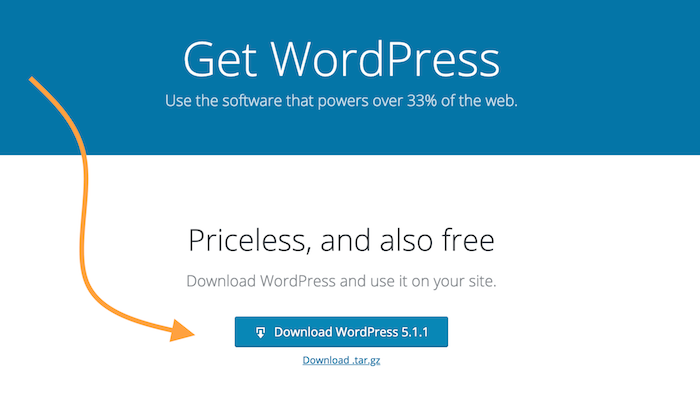 Next:
Note: The name of this folder will also become part of the local address of the site. With mynewsite being the folder name, the address of the site is going to be localhost/mynewsite.
Take the contents of the WordPress archive and move them to this new subfolder (“mynewsite†or whatever you named yours). It should look like this: 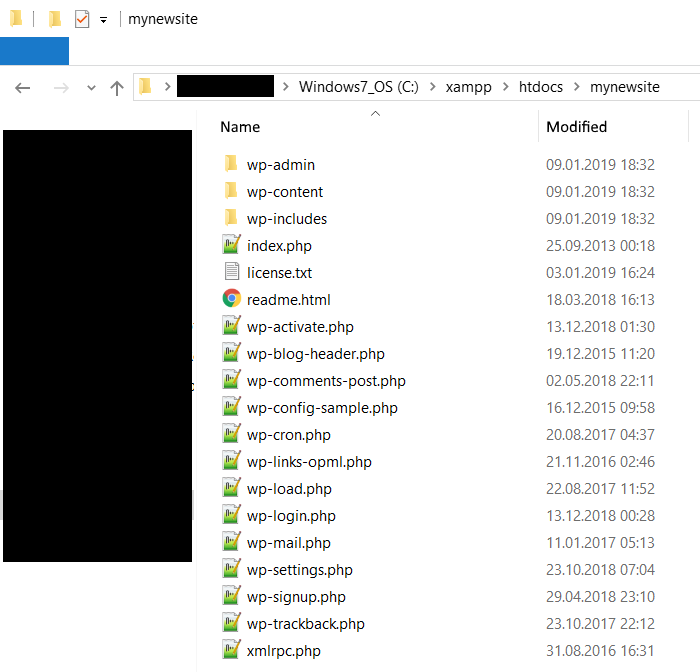 Step #4. Install WordPress Locally on WindowsOpen your web browser and navigate to localhost/mynewsite. What you’ll see is the on-screen WordPress Installation Wizard. The first step is choosing your language: 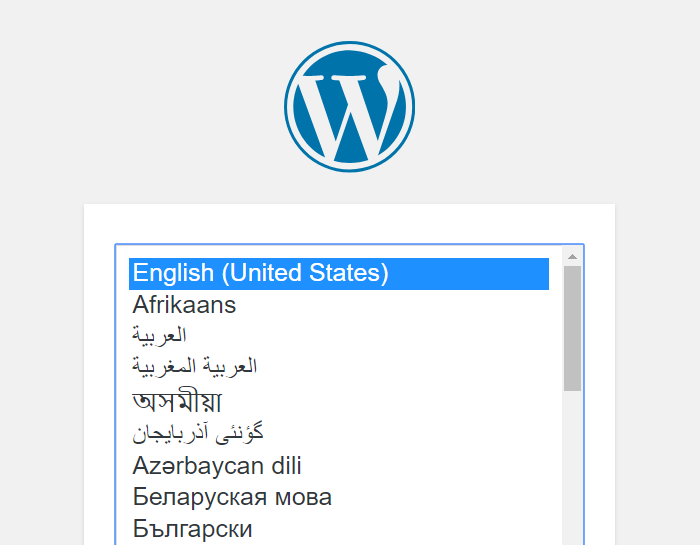 The next screen is an info card to get you up to speed with what’s going to happen. Click on Let’s go! once you’ve read it. The next step is a crucial one in the installation. This is where you get to enter the details of your WordPress connection to the database. Here are my settings based on everything I’ve set in the previous steps so far: 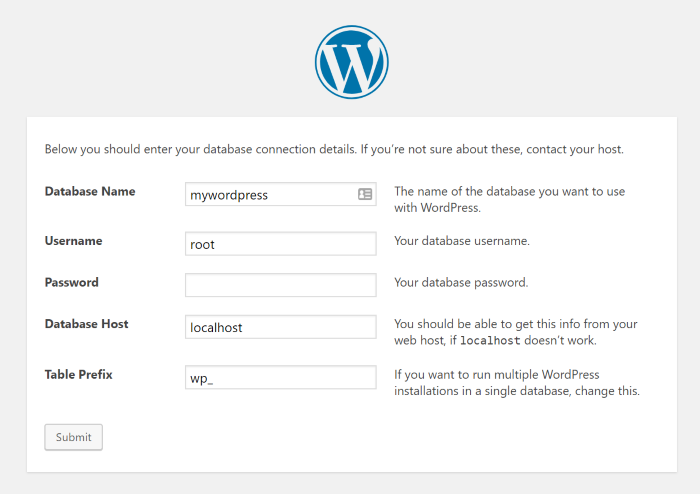 Important parts:
The next step is where you get to set the name of your site and the details of your main admin account: 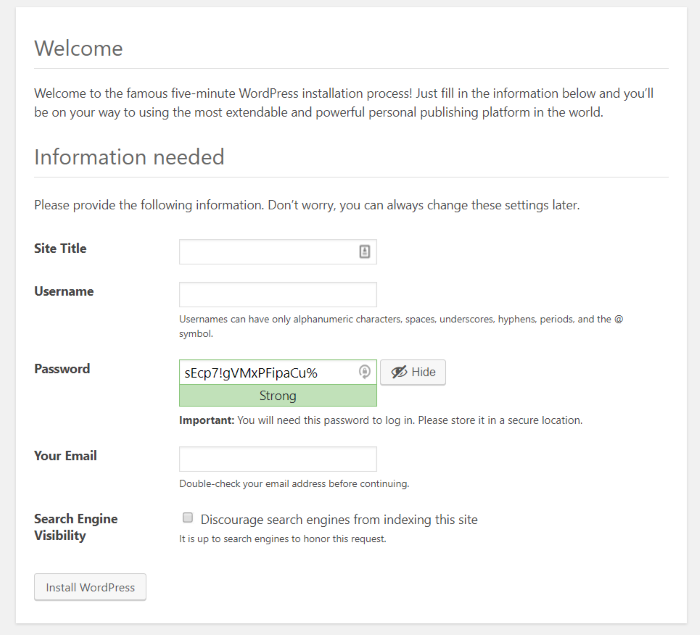
Note: With the exception of username, you’ll be able to easily change these later in your WordPress dashboard.
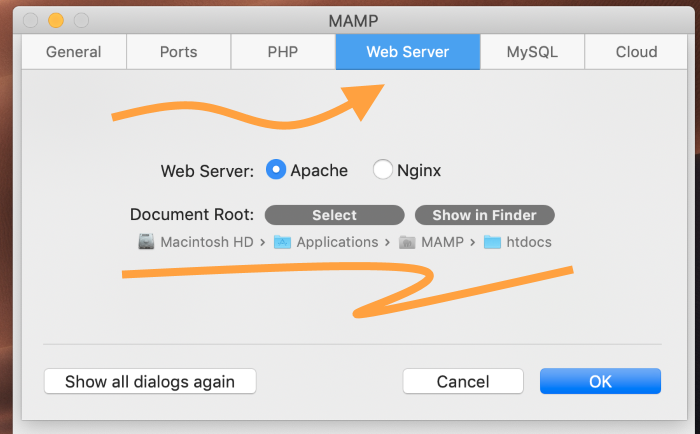
Click on Install WordPress to finalize everything. And that’s it. You’ve installed WordPress locally on Windows. How to Install WordPress on MacWhile installing WordPress locally on Mac isn’t the usual “get app from App Store†experience we’re used to, it can still be done with relative ease. Here’s how to install WordPress on Mac: Step #1. Get MAMPMAMP is a local web server that works quite well on Mac. (It’s also easier to install than some of its alternatives.). 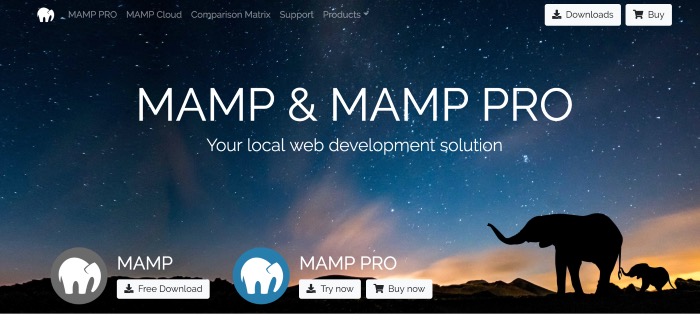 From the MAMP website, go to the downloads section and choose the option for macOS:  Save the package to your computer. Launch the MAMP installer and proceed through the on-screen wizard. 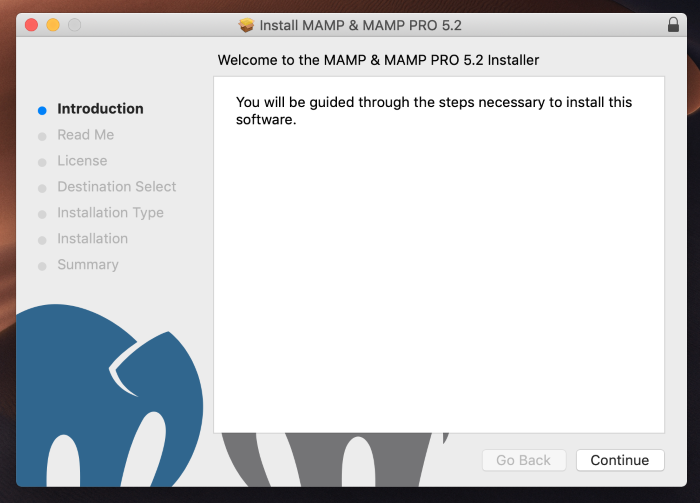 When the installation finishes, open MAMP from Mac’s Launchpad. In the config panel, click on the main Start Servers button. 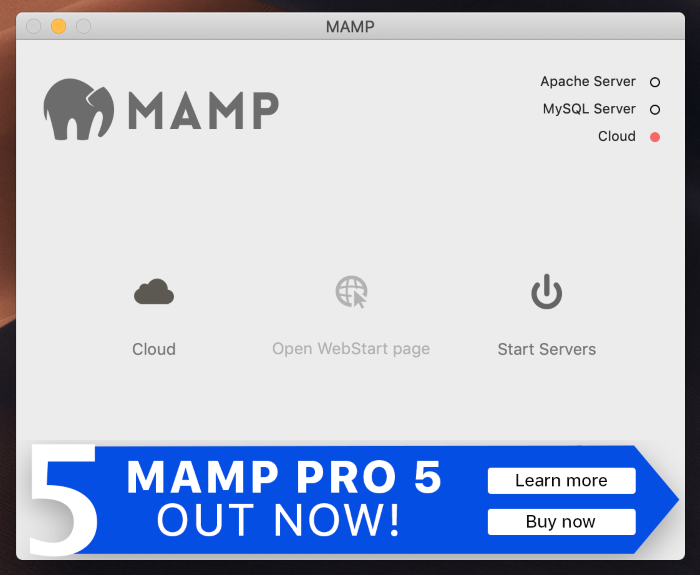 Congrats! Your local server is working. Step #2. Create a Blank Database for WordPressAs soon as you start your server in MAMP, you will be taken to the server’s homepage. Usually, it’s “http://localhost:8888/MAMP/†(without the quotes). From there, click on PHPMYADMIN under TOOLS: 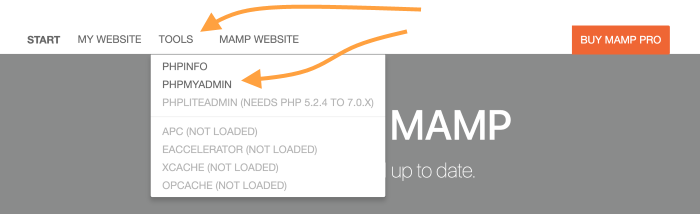 As mentioned earlier in the post, PHPMyAdmin is a handy, open-source database management tool. We use it to create a new database for WordPress. 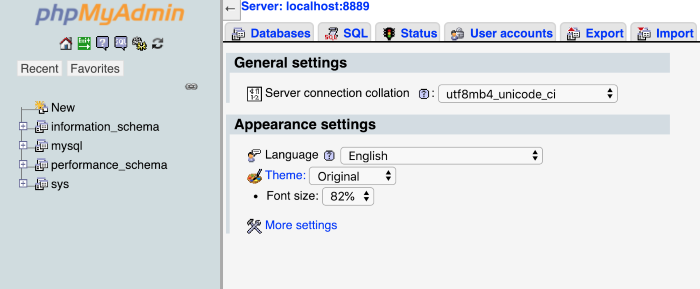 Go into Databases (from the top menu):  Enter a name for your new WordPress database (something simple) and click on Create. Like so: 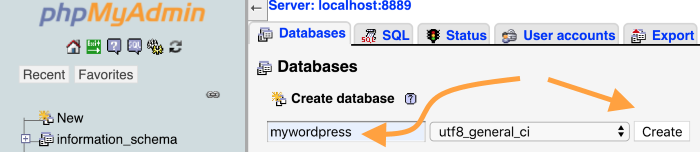 You should see your new blank database in the sidebar. 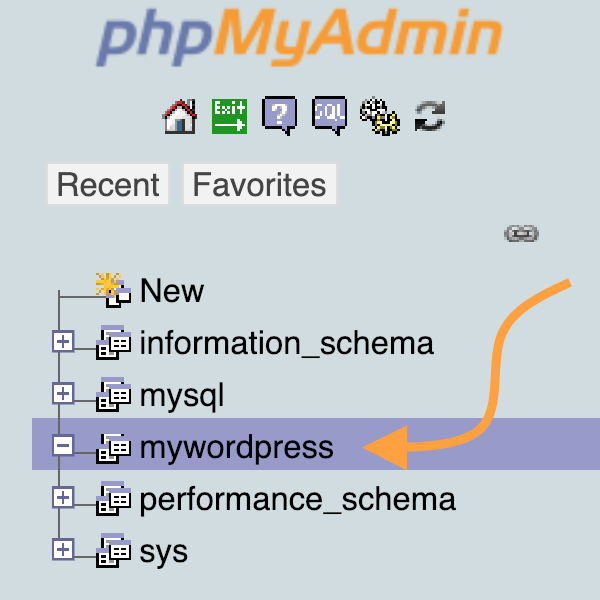 You can now exit PHPMyAdmin. Step #3. Download WordPressGo to WordPress.org and download the most recent version of the software. Next:
Note: The name of this folder will also be part of the local address of the site. With mynewsite being the folder name, the address of the site is going to be localhost:8888/mynewsite.
Take the contents of the WordPress archive and move them to the new folder you created. It should look like this: 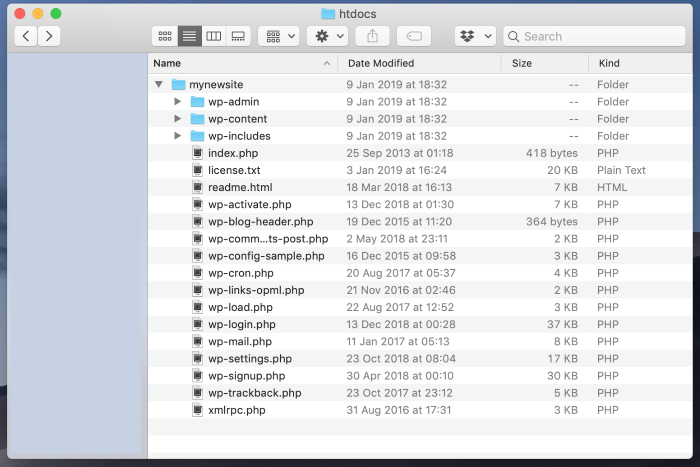 Step #4. Install WordPress Locally on MacOpen your web browser and go to localhost:8888/mynewsite. What you’ll see is the on-screen WordPress installation wizard. The first step is choosing your language: The next screen is an info card to get you up to speed with what’s going to happen. Click Let’s go! once you’ve read it. In the next step, you will enter the details of your WordPress connection to the database. Here are my settings based on everything I’ve set in the previous steps: 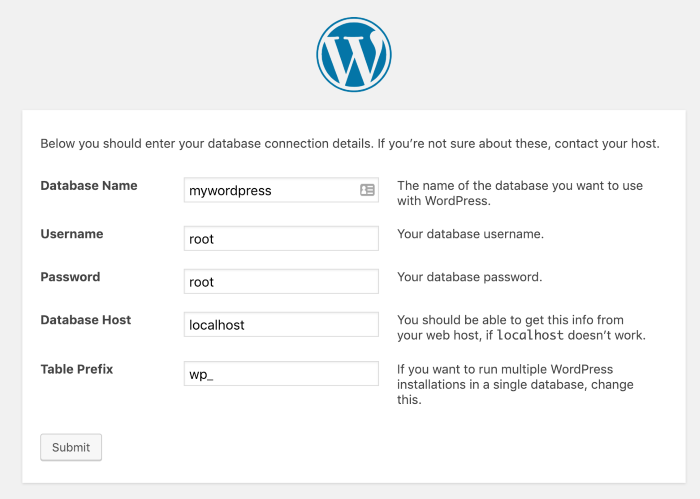 Important parts:
The next step is where you get to set the name of your site and the details of your main admin account:
Note: With the exception of username, you’ll be able to easily change these later in your WordPress dashboard.
Click on Install WordPress to finalize everything. And that’s it. You’ve installed WordPress locally on a Mac How to Install WordPress via FTP (Or, How to Install WordPress Manually)Installing WordPress via FTP takes only minutes, but you do need to have a couple of things ready beforehand. Chiefly, you need to have access to a web server — aka, a web hosting account.
Editor’s Note: Two WordPress hosting options we recommend to our Smart Blogger students are SiteGround (affiliate link) and WP Engine (affiliate link). Both are great options.
Start by going to your host of choice and purchasing one of the available web hosting plans. If you already have a web host, you’re ahead of the game! Next: Step #1. Download WordPressGo to WordPress.org and download the latest version of WordPress. Save the package to your computer and extract its contents. Step #2. Upload WordPress Files to Your ServerThe next step involves connecting to your web server via FTP and uploading your just-downloaded WordPress files. You’re going to need to use a third-party FTP tool to do that. FileZilla is a popular one. We’ll use it for the purposes of this demo. Now, in order to connect to your server, you’ll need your connection details. This information should have been provided via email when you first signed up for your hosting account. But if you can’t find it, no worries. You can find your FTP information inside your host’s cPanel. Go to the FTP Accounts section (under FILES): 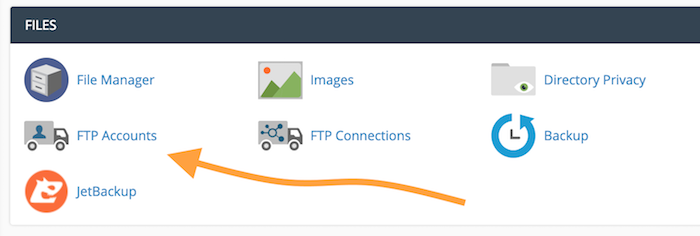 You’ll find your FTP accounts there. Or, alternatively, you can create your FTP account if one doesn’t already exist. Next to your FTP account, there’s a link labeled Configure FTP Client. Click on it:  This will reveal a new section. In it, click on the FTP Configuration File button under FileZilla: 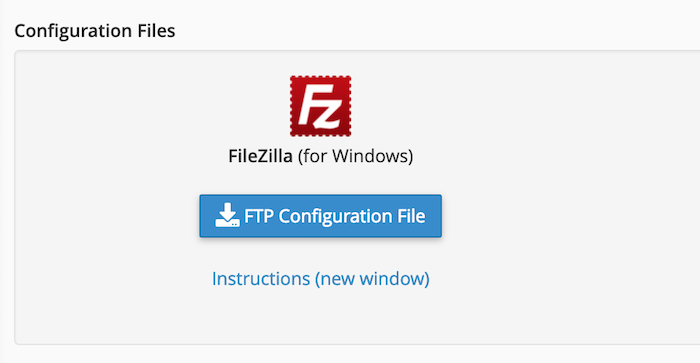 You can open that file with FileZilla and set up your connection details immediately. With that done, the only thing left to do is upload your WordPress files to the server. Depending on your hosting setup, you might need to upload WordPress to a specific directory. However, for most users the directory will be called public_html or public_www. If in doubt, verify with your web host. Step #3. Create a New Database for WordPress in cPanelWordPress, just like any other modern CMS, cannot work without a database. The database is where all your posts, pages, comments, and other site content are kept. To create a new database, go back to cPanel, scroll down to the DATABASES section, and click on MySQL Database Wizard: 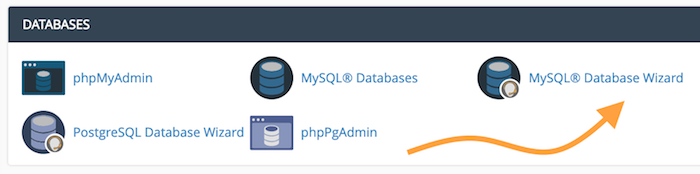 From there, you’ll be guided through the steps to create a new database. First, pick a name for your database: 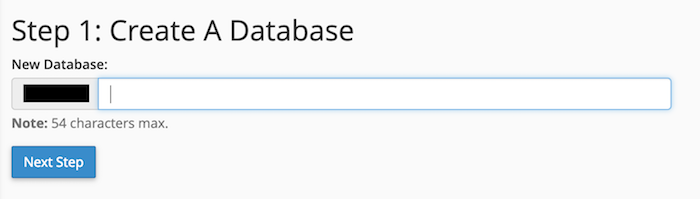 Next, create a new user account that WordPress will use to access the database. 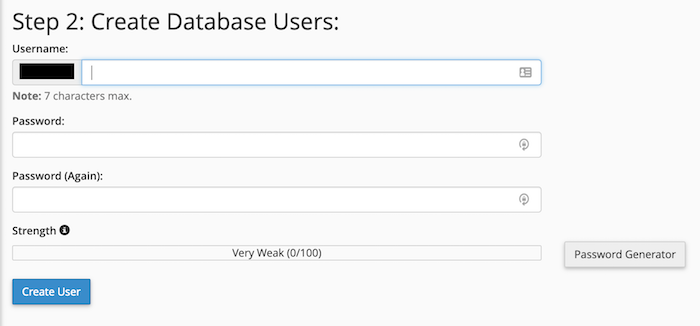
Note: Be sure to jot down the username and the password. You’ll need them in the next step.
Lastly, assign sufficient access rights to the new user account. It’s best to do that by simply selecting ALL PRIVILEGES, like so: 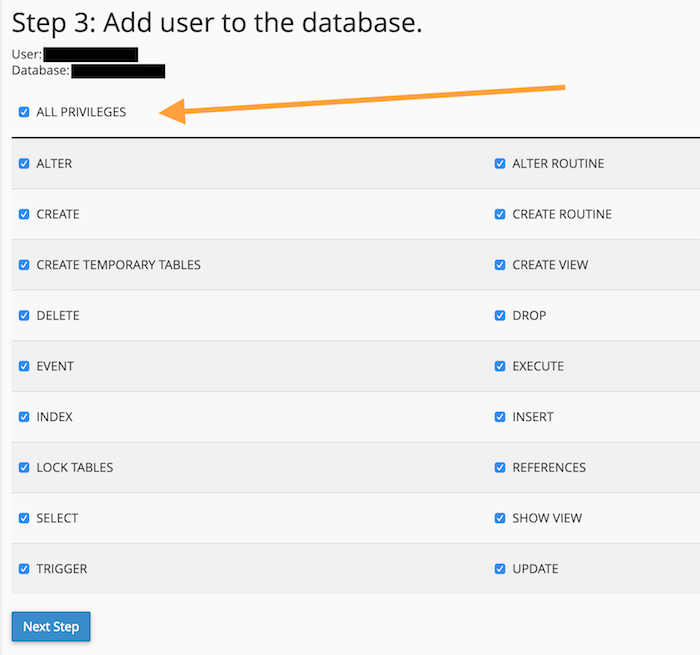 Your database setup is now complete! Step #4. Install WordPress Through the Online InstallerThis is the last step on your journey to getting WordPress installed via FTP. Simply fire up your browser and navigate to your site’s URL. You’ll see the main page of the WordPress installer. First, choose the language of your site: The next step is a crucial one, and it’s where you’ll need to provide your database details. (Hopefully you jotted those details down earlier!) 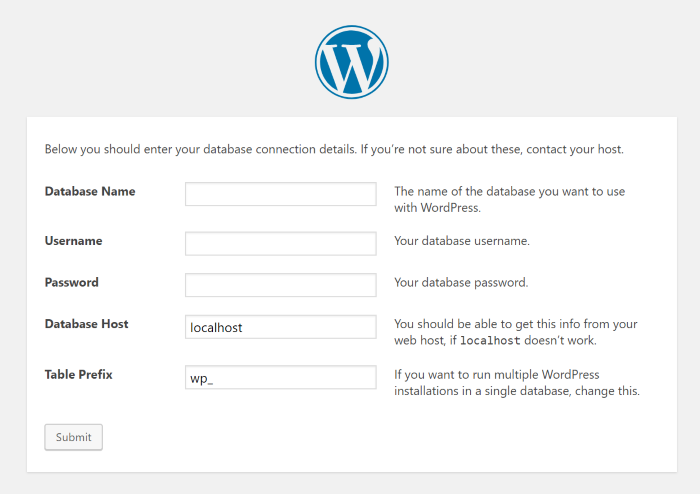 Here’s a breakdown for each:
The next step is where you get to set the name of your site and the details of your main admin account:
Note: With the exception of username, you’ll be able to easily change these later in your WordPress dashboard.
Click on Install WordPress to finalize everything. And that’s it! You’ve successfully installed WordPress manually using FTP. How to Install WordPress MultisiteWordPress Multisite is an interesting feature built into WordPress. Simply speaking, with WordPress Multisite, you can launch multiple WordPress websites, all working on the same WordPress install. This is great for businesses and organizations that need multiple websites, but want to keep the cost of managing them low. WordPress Multisite is also a great choice for universities where it’s very common for individual courses or teachers to have their own sites. Here’s how to set up and install WordPress Multisite: Step #1. Install WordPress Locally, via cPanel, or via FTPTo begin your journey with WordPress Multisite, you first need to install WordPress using any of the methods described earlier in this guide. Go here to install WordPress locally on Windows or here to install WordPress locally on a Mac. Finally, go here to install WordPress using FTP. Once you’ve installed WordPress, you’re ready for the next step. Step #2. Enable WordPress MultisiteConnect to your server via FTP (explained previously in this guide), and download the wp-config.php file from your main WordPress directory. Open the file in Notepad (or similar software) and add the following line at the bottom: define (‘WP_ALLOW_MULTISITE’, true); Save the file and re-upload it to your main WordPress directory via FTP. You’ll want to overwrite the original file. Step #3. Set up Your WordPress Multisite NetworkAt this stage, WordPress is ready to let you configure your network of sites. Here’s how: First, go to your plugins and deactivate all of them.  Next, go to Tools > Network Setup. This is where you create your network of WordPress sites. 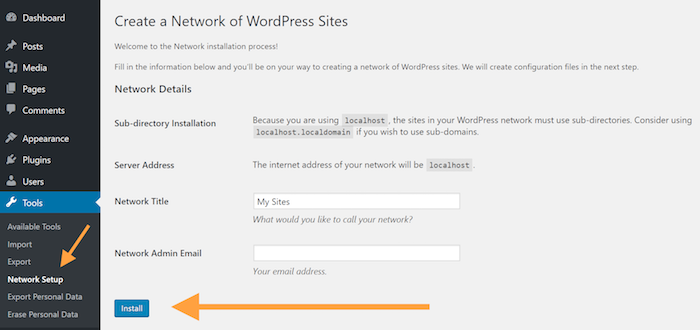 Click on the Install button to begin. On the next screen, WordPress will give you specific instructions for finalizing the setup. 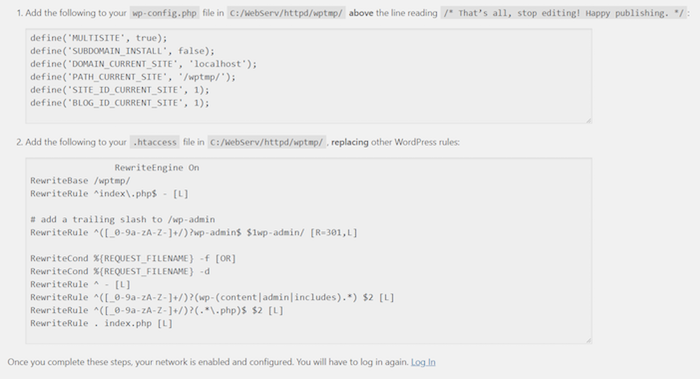 This will involve editing two files in your WordPress directory (similarly to how we did it a minute ago with wp-config.php). Example setup: Step #4. Create your WordPress Multisite SitesOnce you log back into WordPress, you’ll see an updated version of the admin interface with one new section in the top left corner:  This menu is where you can switch between your WordPress sites (and where you can add new sites to the network). Each website is independent, can feature different content, different user accounts, different themes, different plugins, and so on. Congrats! You’ve successfully set up WordPress Multisite. (Feel free to re-activate all your plugins!) How to Install WordPress in Your LanguageDid you know WordPress has been translated into 113 (and counting) languages? It’s true. You can install WordPress in everything from Afrikaans (South Africa) to 香港ä¸æ–‡ç‰ˆ (Simplified Chinese). In short: You can install WordPress in your language, no matter what that language might be. Here’s how to do it: #1. Download WordPress in Your LanguageGo to WordPress.org. Since WordPress is quite predictive and helpful with international users, based on your location, you’ll see a note encouraging you to download WordPress in your language. Here’s an example: 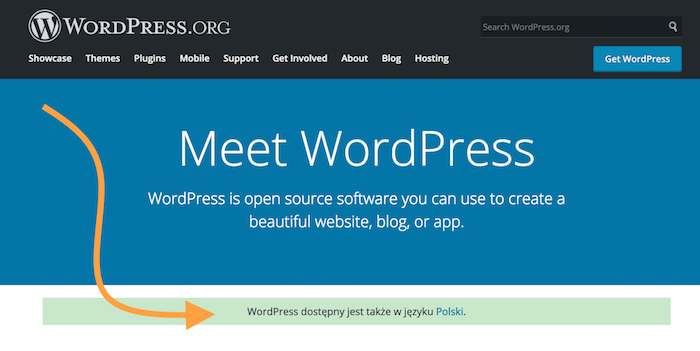 What the above box says is: “WordPress is also available in Polish.†When you click on the language — in this example, “Polski†— you’ll get redirected to a new, localized WordPress website. Once there, download the WordPress package and save the ZIP file to your desktop and extract its contents. #2. Install WordPress via FTPNext, follow the same instructions we discussed earlier in this guide. Click here to jump to Upload WordPress Files to Your Server. Bonus Tip: Installing Language Files from the Admin DashboardIf you’ve already installed WordPress in one language, but you’d like to use a different language, don’t fret. WordPress makes switching your language a breeze. In your Dashboard, go to Settings > General > Site Language. Then simply choose the language you’d like to use. And that’s it! You’re done. How to Install WordPress on 12 Popular Web HostsThe following section covers how to install WordPress on 12 popular hosting providers. Click on a link below to jump to your host:
How to Install WordPress on SiteGroundSiteGround (affiliate link) offers a cool wizard tool to get your WordPress installed in minutes. There’s no need to deal with any coding, settings, or uploading things a server. Here’s a video showing you the process: 
But, if you prefer written instructions, here are the steps: When you log into your SiteGround user panel for the first time, you’ll be greeted by a message asking if you’d like to have a new website set up for you: 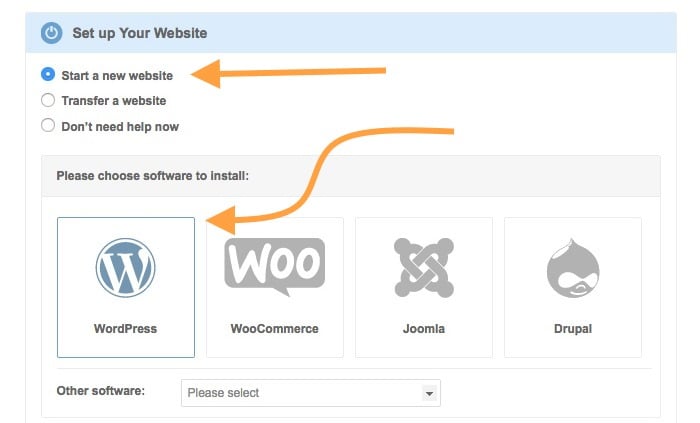 Click on the option labeled “Start a new website†and select WordPress as your platform. SiteGround will also create a new admin account for you. All you need to do is provide the login details: 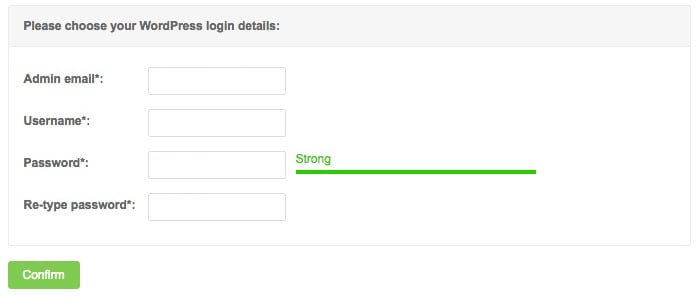 That’s all there is to it. How to Install WordPress on BluehostWhen you sign up for a Bluehost WordPress Hosting plan, the latest version of WordPress is installed automatically for you. All you have to do is configure it. Here are the steps: 
If you’d like to set up additional WordPress sites, it’s easy to do so via the Bluehost dashboard. Go to My Sites, and then click on Create a Site. 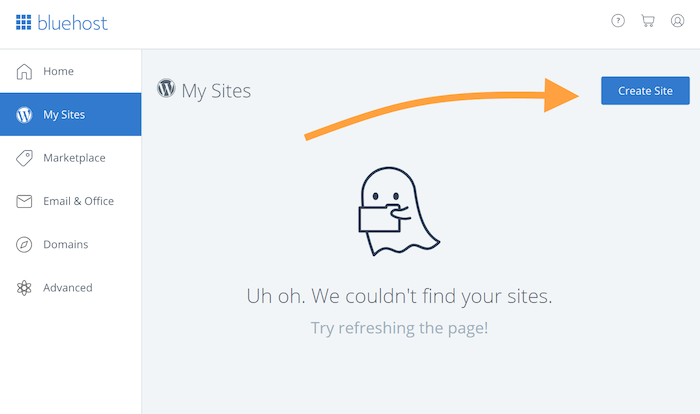 Enter your site details and proceed through the individual screens. First, you’ll need to pick a name for your WordPress installation: 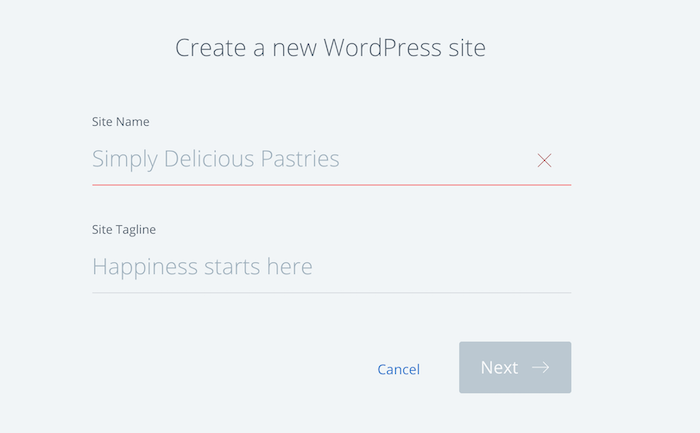 You will then enter the domain name and directory, plus any optional plugins you might want: 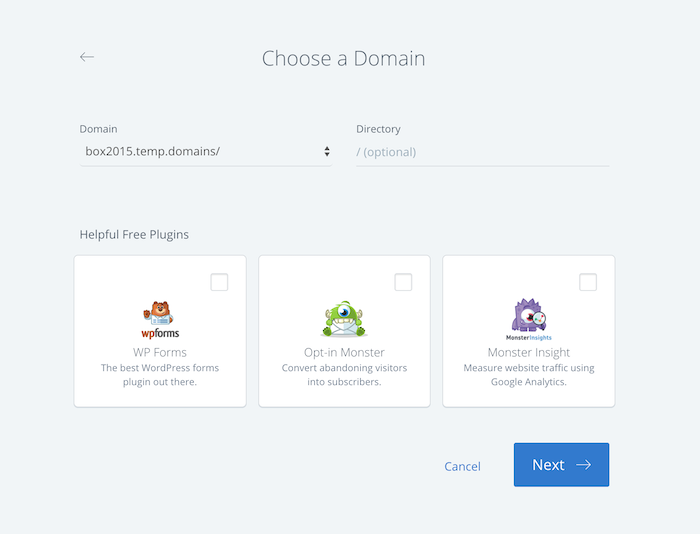 Finally, set your admin user login and password. How to Install WordPress on GoDaddyGoDaddy uses cPanel for installing WordPress on their hosting plans. Here’s their official video walking you through the entire (simple) process: 
And if you need to add another WordPress site, that’s easy too. Log into your GoDaddy user panel, go to Managed WordPress > Manage All. Click Add Site. 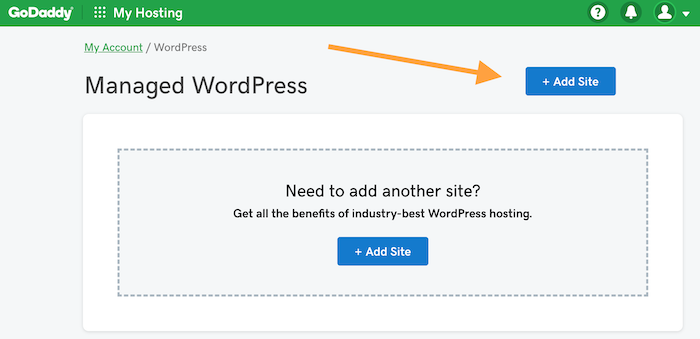 From this point on, GoDaddy will take you by the hand and do most of the work for you. All you’ll need to do is enter a name for your site and your desired login credentials for the admin user. When the installation finishes, GoDaddy will show you a WordPress Setup Wizard to help you customize your site: 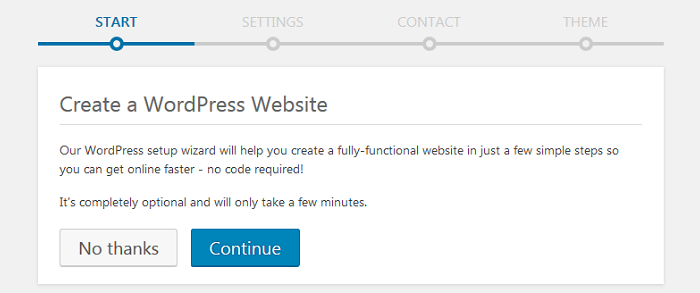 You can click No thanks or Continue. How to Install WordPress on WP EngineWP Engine (affiliate link) is one of the original “managed†WordPress hosting platforms. They handle all the technical heavy lifting for you, so you can focus on what’s important for your website’s success. What this means in practice is WP Engine will install WordPress for you when you create an account. You don’t have to lift a finger. You access the site from your user panel: 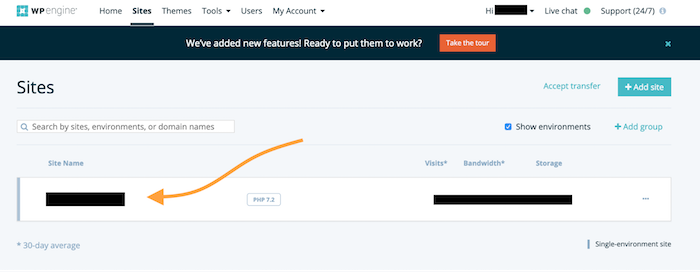 If you want to add additional sites to your WP Engine setup, it’s pretty easy. Here’s a video tutorial showing you how: 
If you prefer written instructions, here’s WP Engine’s official guide for adding or deleting WordPress installs. How to Install WordPress on FlywheelLike WP Engine, Flywheel is a managed WordPress hosting platform. They take care of the technical aspects — including installing WordPress — for you. All you have to do is provide a few pieces of info. Here’s a video walking you through the process: 
If you would like to create additional sites, from your user profile click the Create a New Site button: 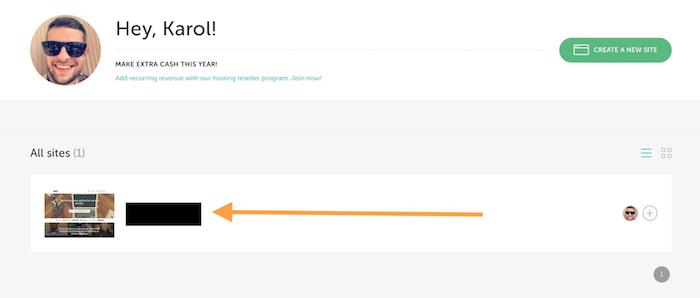 Next, provide all the necessary details such as site name, admin user login, password, and your preferred payment method. 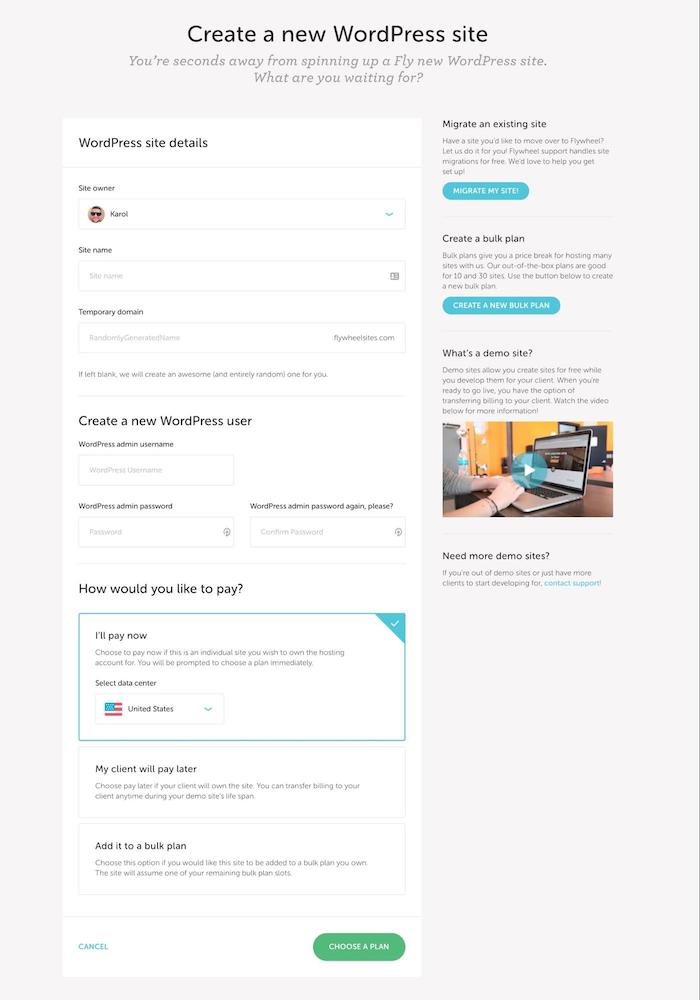 Once you’ve completed the form, your site will become visible in your user profile. That’s all there is to it. Here’s Flywheel’s official guide for adding new sites if you need more information. How to Install WordPress on KinstaKinsta is a newcomer to the managed WordPress hosting market. Like WP Engine and Flywheel, Kinsta installs WordPress for you when you create your account. If you’d like to add additional WordPress sites to your Kinsta plan, follow the steps in this video: 
If you prefer written instructions, here’s Kinsta’s official guide for adding WordPress sites. How to Install WordPress on HostGatorLike many shared WordPress hosts, HostGator gives you access to cPanel. With it, you can easily install WordPress using the steps in the video below: 
Can’t play the video? No worries. HostGator also offers an extensive how-to article for installing WordPress on their platform. How to Install WordPress on DreamHostFor each of their WordPress hosting plans, DreamHost provides WordPress pre-installed. All the work is done for you. If you’d like to add additional WordPress sites, here’s a video showing you how it’s done: 
Prefer written instructions? Here is Dreamhost’s how-to article for using their handy 1-Click WordPress Install. How to Install WordPress on A2HostingA2Hosting offers both shared and managed WordPress hosting. For shared hosting, they offer 1-Click WordPress installation using Softaculous. Here’s a video to walk you through the steps: 
If you opt for one of their managed hosting plans, WordPress will come pre-installed with your A2Hosting account. If you’d like to add more WordPress installs to your account, here’s the official A2Hosting video to show you how: 
How to Install WordPress on InMotion HostingLike its managed-hosting competitors, InMotion Hosting provides pre-installed WordPress on your hosting account from the get-go. This means that you don’t need to install WordPress on your own. If you’d like to install WordPress on an add-on domain, InMotion offers this handy tutorial video: 
How to Install WordPress on iPageJust like other “managed†WordPress hosting companies, iPage provides WordPress pre-installed with your account. (You also get a set of pre-installed WordPress themes and plugins.) Here’s a helpful video showing you how to configure your iPage WordPress site: 
If you need to install some additional WordPress sites on iPage, click here to read their guide. How to Install WordPress on HostingerHostinger offers a quick-and-easy auto installer for WordPress. Here’s their official video showing you how it’s done: 
If you prefer written directions, here’s Hostinger’s tutorial for installing WordPress (using various methods). Frequently Asked QuestionsBefore we wrap things up, let’s go over a few common, related questions we often hear: Do I Need to Install WordPress?Answer: It depends. If you use a “managed†web host like WP Engine, installing WordPress is taken care of for you. You don’t have to do anything (beyond filling in a few pieces of information). However, if you’re using a “shared†hosting plan, you’ll need to install WordPress. The good news is that most web hosts have made the process easy. A few clicks and you’re finished.
Editor’s Note: This is all assuming, of course, you want a WordPress site. WordPress is awesome, but it’s not the only game in town — there are many blogging platforms out there.
Does WordPress Cost Money?No, the WordPress software is 100% free. Anyone can go to WordPress.org and download it for free at any time. The typical costs for running a WordPress website come from other factors, such as purchasing a domain name and choosing a hosting provider. Does WordPress Include Hosting? (Or, Does WordPress Host Your Site?)If you’re using WordPress.com, the answer is yes. WordPress.com is a free, hosted version of the WordPress software offered by the company. (You can upgrade to various paid plans if you need more features.) However, if you’re using the self-hosted version of the software available for free at WordPress.org, the answer is no. You’ll need a hosting provider. Which Hosting is Best for WordPress?WordPress.org officially recommends Bluehost, DreamHost, and SiteGround. At Smart Blogger, we recommend SiteGround (affiliate link) and WP Engine (affiliate link). Since SiteGround is on both lists, it’s safe to say it’s a solid option. How to Install WordPress Themes?Your WordPress installation will come with several free themes (designs), but there are thousands of additional themes — both free and premium — you can add. Here’s a quick guide for how to install WordPress themes from inside your WordPress dashboard. How to Install WordPress Plugins?Though you have to be careful not to go overboard with them, WordPress plugins are one of the software’s best features — they allow you to add all sorts of functionality to your WordPress site that’s not available out of the box. SiteGround has published a helpful tutorial for how to install WordPress plugins if you would like step-by-step instructions. How to Install Facebook Pixel on WordPress?If you’re interested in running Facebook Ads (either now or in the future), you need to install a Facebook Pixel on your WordPress site. What’s a Facebook Pixel? It’s a piece of tracking code you add to your website that collects data whenever someone visits your site or takes a specific action. Here’s a video explaining it in more detail (including how to install it): If you prefer written instructions, here is Facebook’s help article on Facebook Pixel, which includes steps for creating and installing them. It’s Time to Install WordPressInstalling WordPress can be overwhelming — especially if you’ve never done it before. Hopefully, this in-depth guide has been able to point you in the right direction. Use it, bookmark it, and feel free to share it with a friend. And if there’s an installation method we missed, tweet us or let us know about it in the comments. We’ll happily add it.
About the Author: Karol K. (@carlosinho) is a WordPress figure-outer, blogger, and published author of WordPress Complete. His work has been featured all over the web on sites like: Ahrefs.com, Smashing Magazine, Adobe.com, CodeinWP.com, and others.
The post How to Install WordPress in 5 Minutes or Less (2019) appeared first on Smart Blogger. from https://smartblogger.com/how-to-install-wordpress/
0 Comments
You want to make money as a writer, right? You’ve told everyone on Facebook (including your weird aunt) that you’re available to write. You’ve been writing guest post after guest post to showcase your talent and get your name out there. Maybe you’ve even landed a few jobs already. (Good for you!) But then a potential client emails you with the question, “Do you offer ghostwriting services?” And you’re stumped. Maybe you’ve heard of ghostwriting. Maybe you have some idea what a ghostwriter is. Or maybe you wonder if it involves ouija boards in some way. You don’t want to look like an idiot by emailing back to say, “Err… what do you mean?” That sounds like a good way to send your potential client running for the hills. But don’t worry — I’m about to tell you everything you need to know about ghostwriting, starting with… What IS Ghostwriting?You might already have some hazy ideas about ghostwriting. When I first heard of ghostwriting, I thought it was just used for celebrity memoirs. It turns out memoirs are just the tip of the iceberg. Ghostwriting is everywhere — from independent authors using Kindle Direct Publishing to popular bloggers using WordPress. So what is it? When you ghostwrite, you let someone else put their name on your work. That is, you don’t get any credit — at all. Typically, the person who commissions the work will own the copyright, which also means they can modify or republish the work in any way they see fit. So why would someone hire a ghostwriter? Are they too lazy to write their own stuff? Not necessarily. People hire ghostwriters for many different reasons, but the most common ones are:
It’s nothing new, either: ghostwriting has been around, in one form or another, for centuries. To give you a better idea what being a ghostwriter may involve, my own ghostwriting has included:
As you can see, ghostwriting has a spectrum from something akin to an editing relationship to writing a piece from scratch. And it’s growing in popularity. The demand for ghostwriters is so high it’s now taught in schools — California State University, Long Beach offers a Ghostwriting Professional Designation Program led by Claudia Suzanne. Of course, I’ve only ghostwritten for blogs. Authors like Roz Morris have written whole books as ghostwriters, which is a far more involved process that includes extensive interviews with the client. But Why Would You Let Someone Else Take Credit for YOUR Writing?Assuming you want to build up your own brand as a writer, why would you want to be a ghostwriter? After all, you won’t get any of the credit. Your name won’t appear anywhere on the piece, and you probably can’t tell anyone you wrote it. So why do so many writers ghostwrite, and why do so many love it? Well, because there are major benefits: Benefit #1: Being a Ghostwriter Pays Exceptionally WellOne huge reason to be a ghostwriter is money. Ghostwriting tends to pay better than regular freelancing. After all, having your name attached to your words is valuable for you as a writer. When you have a byline, you can use that piece of work to showcase your talent, build your reputation, and potentially attract new clients. So it’s appropriate (and standard practice) to increase your fee to compensate for the loss of these advantages. There’s no exact rule of thumb for how much extra you should charge for ghostwriting over regular freelancing. Personally, I tend to increase my fee by about 15%–20%. On top of that, once you’ve established a ghostwriting relationship with someone, it often results in ongoing work for you. Most people want their writing to be consistent, so it makes sense to stick with the same writer. In other words, you have consistent work at a higher rate than usual. That’s quite a plus, isn’t it? Benefit #2: Ghostwriting Lets You Develop Closer Relationships with Big Names in Your FieldAs a ghostwriter, you’ll normally work quite closely with your client. You may be privy to their rough notes or mind maps, or you might interview them on the phone or in person. Chances are, you’re also focusing your ghostwriting on a particular area of expertise (especially if you’re writing for a blog). This means you’ve got a brilliant opportunity to get to know and be affiliated with someone well-established in your field. You’ll find that you get valuable insights into the “behind the scenes” of a top blog, or you get a clearer idea of how a big-name author works and thinks. This may be eye-opening! It could give you some ideas for how best to move forward with your own business when you start your own blog. And as you build up closer relationships, or even friendships, with your client, they might share your other work on social media, bringing you a lot of extra traffic. (Several of the people I ghostwrite for have supported me in that way.) If you ever need a favor or need some advice, there’s a good chance they’ll be very happy to help. So much of blogging success depends on getting a helping hand from other bloggers — particularly those with a large audience and a great reputation in their field. Ghostwriting brings you into close contact with exactly those people. The Counterpoint: Why You Might NOT Want to Be a GhostwriterThere are a couple of big concerns that writers have about ghostwriting: “But surely that’s not ethical?” “But why should they benefit from my hard work?” “But what about building my platform?” These are real, valid concerns. And for you, they may be deal-breakers. So let’s dig into them. Objection #1: “When You’re a Ghostwriter, You’re Helping Someone Fool Their Readers — That’s Unethical”When you’re a ghostwriter for someone, they pass your words off as their own. Which begs the question… The authors who hire ghostwriters certainly think it is! But not all writers or readers agree. Many feel that some types of ghostwriting are more ethical than others. For instance, think about these two scenarios, which are on opposite ends of the ghostwriting spectrum:
Personally, as a reader, I’d feel comfortable with situation #1. The thoughts in the e-book belong to the blogger, but the ghostwriter has helped shape them. Situation #2, however, seems a lot thornier. As a reader, I’d feel cheated by that. I’m buying the e-book because I want the blogger’s expertise — not that of a ghostwriter I don’t know. If you’re thinking of ghostwriting, you have to make up your own mind about what is — and isn’t — ethical. Where would you personally draw the line as a ghostwriter, if at all? For more thoughts on the rights and wrongs of ghostwriting, check out Patty Podnar’s post Is Ghostwriting Ethical? Also, Amanda Montell’s Your Favorite Influencers Aren’t Writing Their Own Content—These Women Are is quite eye-opening about some of the less ethical practices in the ghostwriting world. Objection #2: “It’s Too Painful Watching Someone Else Get Praised for YOUR Work”It may sound silly, but not getting recognition for your writing can be quite painful — unbearable to some. I have to admit that, as a writer, it can sometimes sting a little to see a blogger receive lots of lovely praise for a post that I wrote every word of. And I’m not alone; many writers find themselves missing the attention and craving the recognition. It’s no fun watching someone bask in glory that should be yours. But think of it this way: All that praise is a sign you did a great job. You can be proud of that, and you can feel confident you’ll get hired again! Also, as ghostwriter Roz Morris points out in an interview with whitefox, it’s not just ghostwriters who go unnoticed by readers:
There are many unsung heroes in the creative industries, and ghostwriters are only one of them. Editors can also make a huge difference to a book and are rarely credited.
So, if you can’t stand watching someone else take the praise, that’s okay. Many writers feel that way. But maybe we should also keep things in perspective. Objection #3: “Ghostwriting Keeps You from Building Your Platform”Even if you’re okay with someone else getting the praise, you may still oppose the idea of letting them take credit. Some writers feel that, to become a successful freelance writer, you need to take credit for every powerful word you write and create an impressive body of work with your name on it. They believe that ghostwriting is essentially a waste of time. After all, when you’ve got a bio (or at least your name) on every blog post you write, each of those posts helps raise your profile. You’ll be bringing in new readers and potentially new clients through your work — without any additional marketing. This is essentially the argument that Demian Farnworth puts forward in The Brutally Honest Truth About Ghostwriting:
The first thing every writer should ask is this: What do you want to accomplish as a writer? Is building a personal and visible platform important to you? Will it help you in the long run? If you have to ghostwrite to make ends meet, fine. But beat a hasty path out of the business as soon as possible. It’s your turn to run the show.
I certainly think it’s worth putting some serious thought into how best to make ghostwriting work for you. It might be that you want to solely focus on your own platform (heck, you might even hire ghostwriters of your own, some day down the line!). But there’s no shame in taking ghostwriting jobs to generate a steady income while you build your platform. It doesn’t have to be one or the other. You can do both at the same time. Ghostwriting takes some focus away, but that doesn’t mean it’s not worth doing. By the way: We’ve created a handy visual summarizing this post that you can share and embed on your own site. Check out the image below (click to see a larger view): 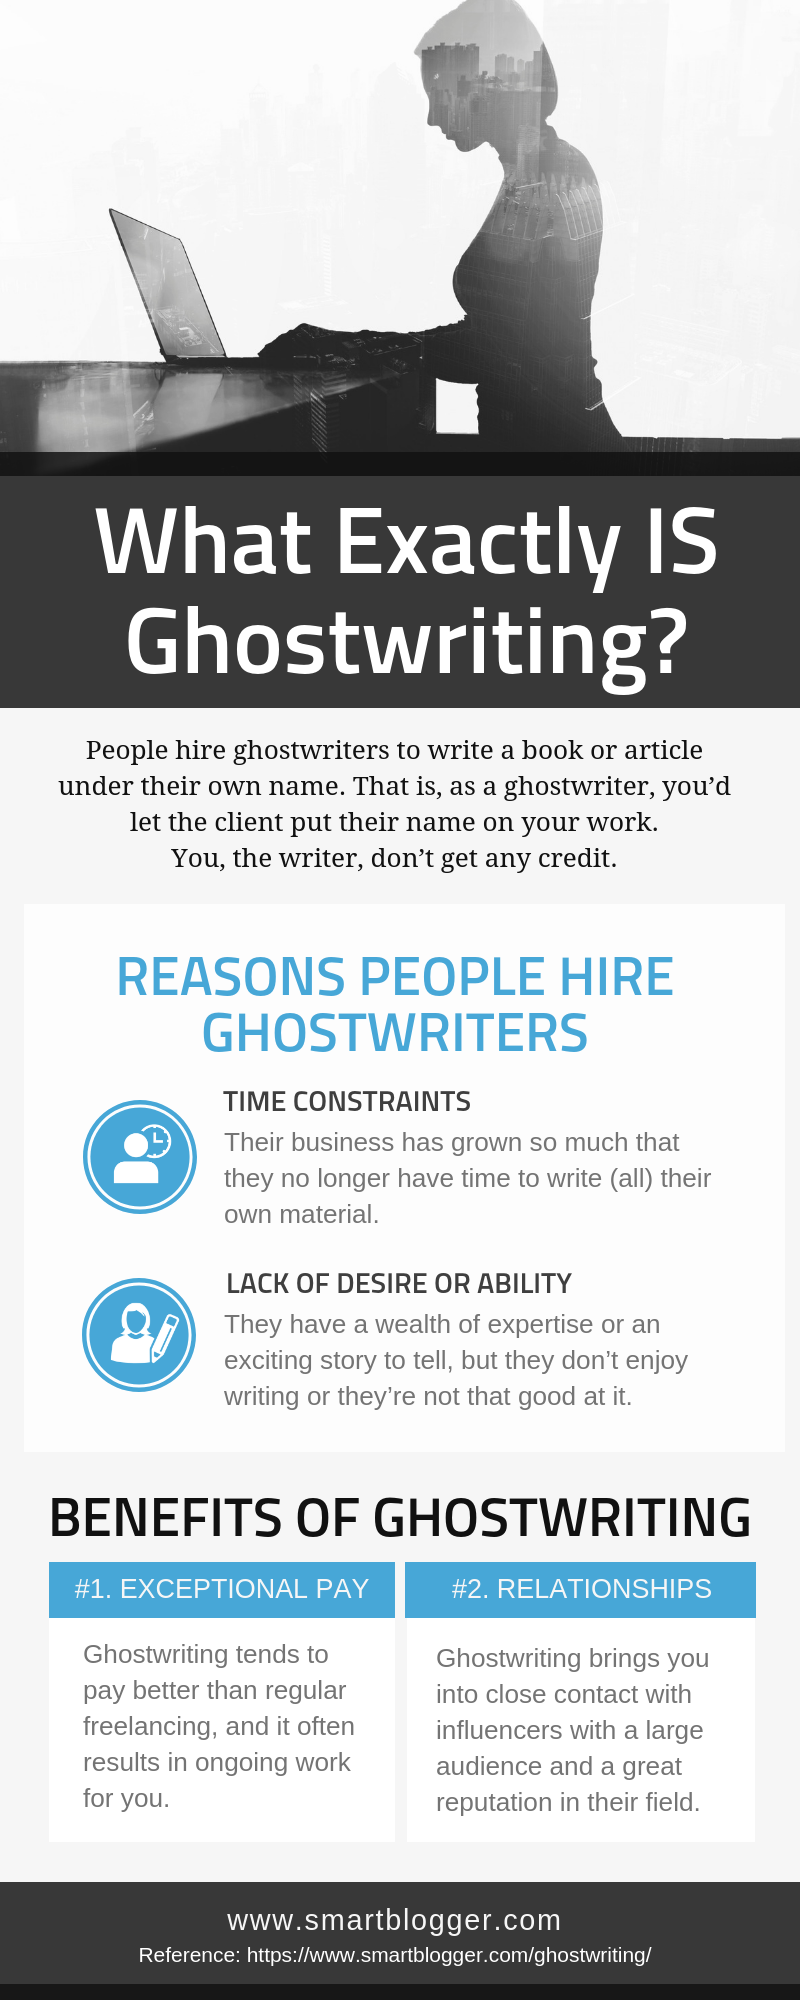
Embed This Infographic On Your Site
How to Become a GhostwriterIf you’ve been nodding your head while reading this post, you’re probably wondering… “Okay, but how do I become a ghostwriter?” Answer: The same way you become a freelance writer. Here are the keys: #1. Build Your Content Creation SkillsIf you want to be a ghostwriter, you have to learn how to create quality content. What’s this mean? It means:
…and more. Nothing will impact your ability to earn real, tangible income as a ghostwriter more than your ability to create amazing content. So, if you don’t know how, learn.
Further Reading: Check out our resource How to Write a Blog Post – The Ultimate Guide. Once you’ve mastered the basics, read How to Create Content People Will Still Remember in 5 Years’ Time.
#2. Learn the Ins and Outs of SEOIf you can create content that will rank on Google, clients will pay you. Happily. Heck, they’ll throw money at you. So how can you help your content rank on Google? By learning all you can about Search Engine Optimization (SEO) and applying what you learn to the content you create.
Further Reading: Don’t know SEO? Brian Dean has a great guide that will help you learn the basics of SEO fast.
#3. Build an Awesome Portfolio of Sample ContentIdeally, you’ll have three levels of portfolios:
But when you’re just starting out, you need to focus on the first level: A portfolio that proves you know how to create a decent piece of content. If you don’t already have your own blog or website, create an account on a free blogging platform like Medium. Two or three sample posts are enough, and you can get started right away. #4. Find Your First Paying ClientIn the early days, finding those first few clients will be difficult. Even with solid content creation skills, SEO know-how, and a great portfolio proving you know how to write, finding paying clients without word of mouth and referrals won’t be easy. Here’s what you’ll need to do:
It’ll be a slow process at first, but once you get those first few clients you’ll be set. Do a great job, make your clients happy, and referrals will happen.
Further Reading: Bookmark this giant list of content marketing agencies. It’ll come in handy.
Ghostwriting 101: A Quick RecapWe’ve covered a lot, so let’s review:
What Is Ghostwriting?
Ghostwriting is when a writer (“ghostwriter”) is hired to create a piece of content for a company or individual, who will then publish the work as their own.
Do Ghostwriters Get Credit for Their Work?
Ghostwriters are paid to let someone else put their name on their work — they do not receive any credit, and they usually cannot tell anyone they wrote it.
Why Do People Hire Ghostwriters?
There are numerous reasons why someone would want to hire a ghostwriter, but two big reasons are time restraints and a lack of desire (or ability).
Regardless of their reason, parties who choose to hire ghostwriters do so because it’s advantageous. (They’re getting something out of it, in other words!)
What Are the Benefits of Being a Ghostwriter?
There are two huge benefits to ghostwriting:
Because they miss out on auxiliary perks like bylines and having their name attached to the content, ghostwriters are usually well compensated.
How Much Do Ghostwriters Make?
It varies from writer to writer, but an increased fee of 15% or more from their standard freelancing rate is reasonable when ghostwriting.
What Are the Typical Objections to Ghostwriting?
Those who throw shade at ghostwriting typically do so for one of three reasons:
We’ve covered each of these objections in detail. Whether any of them are deal-breakers is up to you.
How to Become a Ghostwriter
The process is very similar to the one for becoming a regular freelance writer:
In short:
Will You Give Ghostwriting a Try?Ultimately, ghostwriting can be a little divisive. Some writers feel — passionately — that readers deserve to know exactly who wrote the words they’re reading. Others feel building your platform is too important to let someone else take credit. But ghostwriting is a good way to make money as a writer. And it doesn’t mean your platform is off the table. You can be a ghostwriter and have a writing career under your own name. Many writers, including me, simply use ghostwriting as a way to supplement or support their writing passions. Personally, I think it’s worth it. Only you can decide whether it’s right for you.
About the Author: Ali Luke blogs about the art, craft, and business of writing at Aliventures. If you’re interested in going further with ghostwriting or any type of freelance writing, check out her epic post: Freelance Writing: Ten Steps, Tons of Resources.
The post Ghostwriting 101: How to Get Paid Big Bucks As a Ghostwriter appeared first on Smart Blogger. from https://smartblogger.com/ghostwriting/
It’s okay to admit it. That deep, dark secret you don’t want anyone to know. That thought which keeps you up night after night. You want… to rule the world! You want to dominate your industry and be the envy of all. You want the house in the Hamptons and the spoils that go with it. You want two appetizers with your entree. But you’re afraid. You’re afraid of what others will say when they hear about your dream. You’re afraid it will seem too big — too crazy. Just like you’re afraid of what the waitress will think if you order onion rings and chicken tenders. But mostly? You’re afraid because you don’t know where to begin. You don’t know how to go from where you are as a blogger to where you want to be. You don’t know how to get from here to there. The good news? Just like eating an elephant, you don’t do it all in one bite. World domination — or any major blogging goal — is a journey you take one milestone at a time. 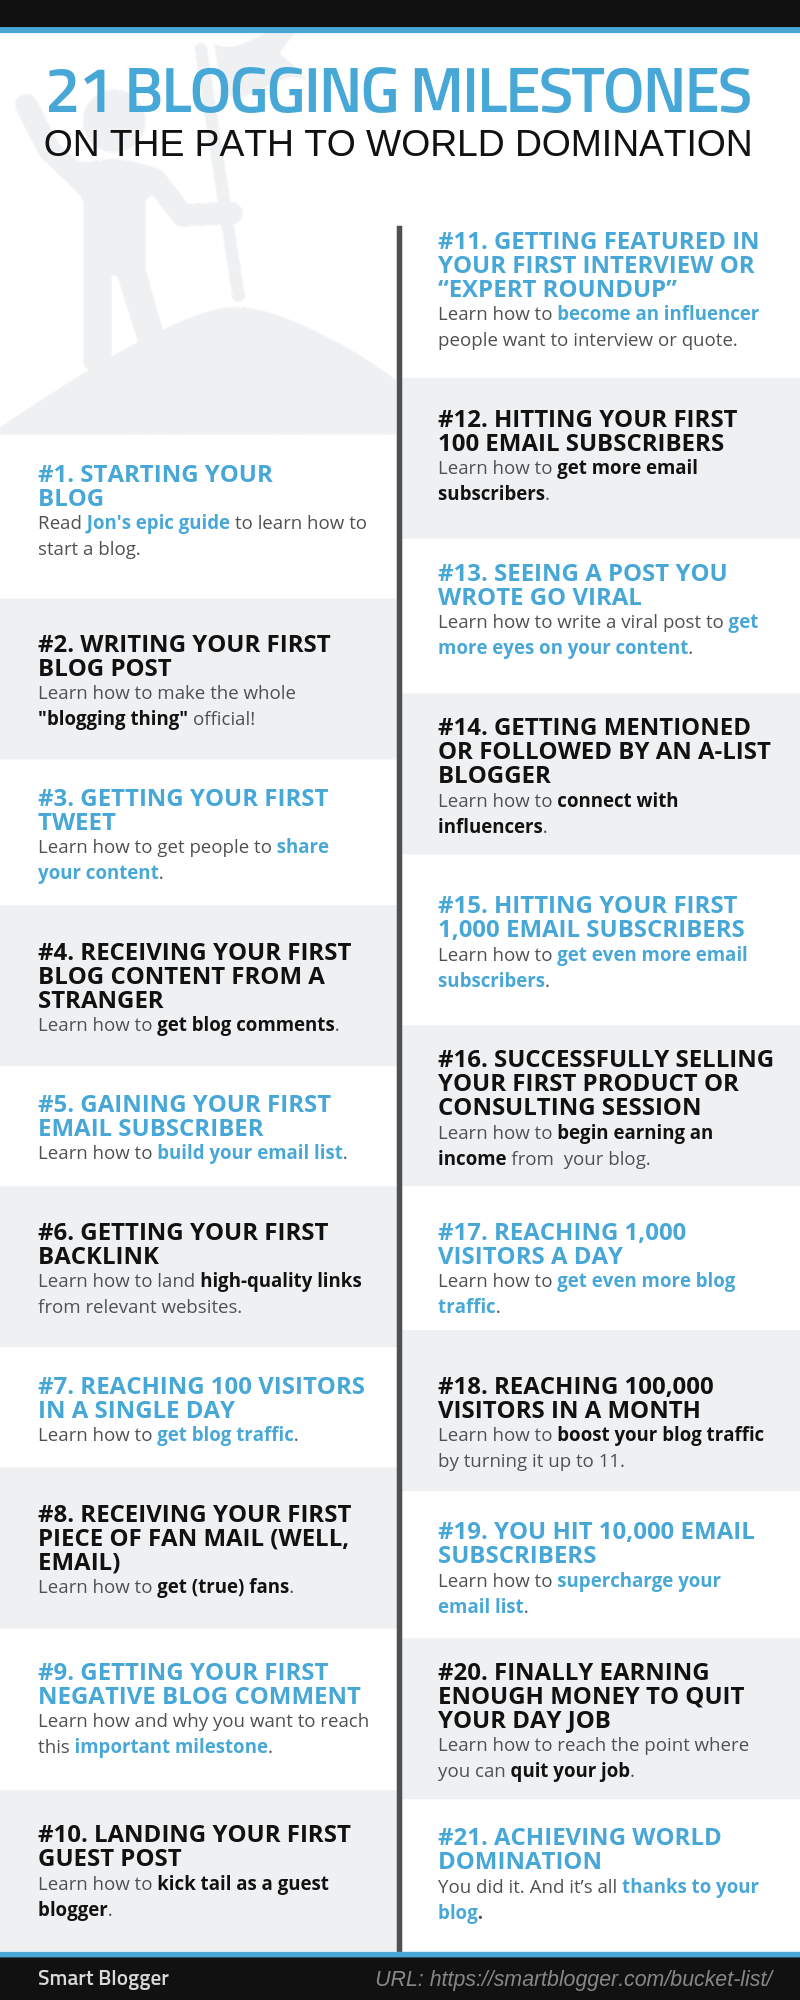
Embed This Infographic On Your Site Why Bloggers Need Meaningful MilestonesWhen you break large tasks into small, manageable ones, what once seemed big and scary isn’t as daunting. Renovating your entire home? Start by painting a room. Training for a marathon? Walk to the end of your driveway. Want to start a rock band? Get a guitar and start practicing. Blogging isn’t any different. Your journey as a blogger is filled with incremental milestones. They start small, gradually increase in size, and culminate with you owning sharks with frickin’ laser beams attached to their heads. Want 10,000 subscribers? Start with 100. Want to quit your job? Focus on making your first sale. Want to be Jon Morrow’s best friend? Get him to notice you. These milestones comprise your bucket list. They highlight what you’ve already accomplished, what you’re striving toward next, and what still lies far ahead of you. To help you in your quest, here are the 21 major blogging milestones (and how to reach each one). Ready? Let’s dive in. #1. Starting Your BlogYou’ve been talking about doing it forever. You’ve been reading blogs like Smart Blogger, Blogging Wizard, and Be A Better Blogger for months. You’ve been planning, scheming, and daydreaming about starting a blog for so long that people have started to worry about that glazed look in your eyes. So don’t you think it’s time you finally did it?
How to Start a Blog
What to Do Next
Once your blog is up and running, it’s time to start writing.
But first, savor this moment. You’ve already accomplished more than many wannabe bloggers ever do… You’ve started a blog. You did it. Now… Let’s get to work. #2. Writing Your First Blog PostBloggers blog. It’s what we do. So once you’ve setup your blog on WordPress, Medium, or wherever, it’s time to make this whole “blogging thing” official. It’s time to write your first post.
How to Write a Blog Post
What to Do Next
After you publish your blog post, it’s time to promote it.
Share it with your friends and family on email and social media. Email it to your subscribers too (if you have any yet). #3 Getting Your First TweetGetting your content shared on social media for the first time is a big milestone. Each time your posts are tweeted, pinned, or liked, your content is exposed to new readers. These new readers are potential email subscribers. Potential customers. Potential allies in your quest for world domination.
How to Get People to Share Your Content
What to Do Next
Be friendly and appreciative. When someone shares one of your posts, thank them. In addition to being good form, this act of gratitude will increase the likelihood they’ll share your posts again in the future.
To boost the number of shares you receive, try using interesting images with embedded headlines as the featured images in your posts. Be sure to choose a relevant picture, or one that creates curiosity. #4. Receiving Your First Blog Comment From a StrangerIt finally happened. The moment you discover someone other than your mom is reading your blog. Your first comment from a stranger. It’s the first sign you’re engaging a real audience (not just friends and family). The first indication your words are striking a chord with readers. The first evidence you have what it takes to succeed.
How to Get Blog Comments
What to Do Next
Were you raised in a barn? Thought not. So once you’ve received a comment, respond to it. Continue engaging with your reader.
Next, visit their blog and leave them a comment. If they don’t have a blog, thank them in an email. True, this level of dedication will be difficult once you’re receiving dozens of comments. But in your blog’s early days? There’s simply no good reason not to go above and beyond to express your appreciation. After you’ve received a few comments, it’s time to implement strategies to further boost your comment count. #5. Gaining Your First Email Subscriber“The money is in the list,” says every blogger (even if nobody has asked them). It’s cliché, but it’s true. Email subscribers are far more likely to read, share, and engage with your content than someone who simply follows you on Twitter or “likes” you on Facebook. Email cuts through the noise. A person might receive a few dozen emails in a day, but they’ll receive several hundred (or more) tweets from their followers. If you want to reach the top of the blogging mountain, you must build your email list. And it all starts with that first subscriber.
How to Get Email Subscribers
What to Do Next
Make your new subscriber feel welcomed.
When someone subscribes to your list, your welcome email should be warm and inviting. Encourage them to ask you a question. Tell them to follow you on Twitter and say hello. Give them a link to an unexpected freebie bonus. (But don’t do all three at once — you might scare away your only subscriber!) #6. Getting Your First BacklinkSearch engines love backlinks — they help them discover how pages are related, and in what ways. Landing a high-quality link from a relevant website is great for SEO and results in more search engine traffic flocking to your website. And who doesn’t want that? When a website links to yours, it’s effectively telling Google, “This dude is cool. He’s with me.” Want to rule the world? You need Google to think you’re cool.
How to Get Backlinks
What to Do Next
Keep going.
Numerous untapped backlink resources are available to bloggers willing to tap them. And if you don’t, your competitors will. #7. Reaching 100 Visitors in a Single DayIn your blog’s early days, visitors are scarce. Occasionally, you’ll wonder if anyone is reading your blog. But slowly, little by little, your numbers creep higher and higher. And then it happens. The day your blog reaches triple-digit visitors. The day your hard work begins to pay off. The day you get your first taste of power. Intoxicating, isn’t it?
How to Get Blog Traffic
What to Do Next
Implement strategies to keep readers on your blog longer. This increases dwell time, which is another way to get Google to like you.
Linking to other posts on your blog, embedding videos, displaying related posts, and encouraging readers to leave comments are all effective methods for keeping visitors on your website. #8. Receiving Your First Piece of Fan Mail (Well, Email)This is strange. You receive an email from a stranger, but it has nothing to do with male enhancement or an unexpected inheritance from overseas. It’s an email from a reader. And she’s telling you how much she enjoys your blog! Your first “kudos” email from a reader is a big milestone for bloggers, and those who go on to rule the world receive many of them. (Mine may or may not be printed, framed, and hanging from the walls of my office.)
How to Get (True) Fans
What to Do Next
Reply to the email. Thank your reader for contacting you, and try to answer any questions they may have asked.
But don’t stop there. Follow them on social media. Visit and comment on their blog. Subscribe to their list, if you like what you see. Your response will make a lasting impression in the mind of your reader. Don’t waste it. #9. Getting Your First Negative Blog CommentAfter weeks of praise, attaboys, and well-wishes, you receive your first negative comment. You try to laugh it off by making a “these are where the tears would be if I could cry” joke, but it doesn’t work. You’re confused. Hurt. Maybe a little angry. (Plus, your spouse quickly reminds you of the time you cried like a baby watching Field of Dreams.) Don’t let it get you down. As you gain in popularity, criticism is inevitable. Consider it a badge of honor — every popular blogger receives negative comments. It’s proof you’re on the right track.
How to Reach This Milestone
What to Do Next
As much as you would like to respond to the negative comment with a barrage of sarcastic wit and venom, don’t do it.
Delete the comment, ignore the comment, or respond to it in a professional manner. But whatever you do, remain calm. Don’t let the insults fly. Others will see how you respond, and it will leave an indelible impression of you in their minds. #10. Landing Your First Guest PostSooner or later, you’ll discover that commenting on other blogs and making friends on Twitter will boost your traffic only so far. You need to reach new audiences. As the marketing crowd would say, you need fresh eyeballs on your content. In other words, you need to write a guest post.
How to Kick Tail as a Guest Blogger
What to Do Next
Your job isn’t finished once your guest post is published. No siree, Bob.
You need to promote the post on your social media accounts. You need to email the post to your mailing list (even if it’s small). You need to respond to any comments readers leave on the post. And, most importantly, you need to thank the blogger or bloggers who gave you the opportunity to write for them. Guest blogging, as much as anything, is about the connections you can make. Backlinks, traffic spikes, and a bump in email subscribers are all nice. But establishing a long-term connection with an influential blog owner? That’s worth its weight in gold. #11. Getting Featured in Your First Interview or “Expert Roundup”When people see you repeatedly mentioned on other sites via interviews and roundups, their perceptions of you change. Yesterday, you were just an attractive guy or gal oozing talent but drowning in anonymity. Today, you’re a freaking rock star. You’re no more knowledgeable than you were moments earlier, but suddenly your powerful words carry more weight with readers. That’s because someone they trust just called you an expert (or treated you like one). To reach world-leader status, others must view you as an authority. They need to consider you an expert in your industry. Participating in interviews and roundups is a great way to make that happen.
How to Become an Influencer People Want to Interview or Quote
What to Do Next
Take advantage of the networking opportunities an interview or expert roundup creates.
If you’ve been interviewed, respond to those who leave comments. Engage with them. Give them a reason to visit your blog. If you participated in a roundup, you now have some common ground with the other bloggers who participated. Follow them on social media. Tag them when you tweet the roundup. Send them emails saying how much you enjoy their blogs. #12. Hitting Your First 100 Email SubscribersFinally. After having single- and double-digit subscribers for what seems like forever, you finally reach 100. One hundred individuals decide they want updates from you. These first 100 subscribers are arguably your most important. They’re the ones who found your blog in its early days. They’re the ones who decided to follow you before you were popular. They’re the ones likely to be your biggest supporters as you rise through the ranks and vanquish kingdoms.
How to Get More Email Subscribers
What to Do Next
Why not survey your subscribers? You’ve built a small tribe and it’s time to discover what they think.
Find out what kind of content they want you to create, and what kind of content they wish you would stop creating. To encourage participation, turn your survey into a contest. #13. Seeing a Post You Wrote Go ViralWow. That was unexpected. One of your posts takes off. It goes viral, as the kids say. At its simplest definition, a viral post is one which has a life beyond your own promotion of it. As such, it gets considerably more clicks and shares than your typical post. And, as a result, your blog receives a nice (if temporary) bump in traffic. Even if it’s short lived, a viral post means more eyes on your content. And that’s just what a prospective world ruler wants.
How to Go Viral
What to Do Next
Since the bump in traffic is only temporary, you must capitalize on it. You must turn as many of those visitors into subscribers as possible.
Make sure your call to action is clear and singularly focused. Offer a content upgrade for users who subscribe. Use one of the dozens of available WordPress plugins designed to help you boost your subscriber count. #14. Getting Mentioned or Followed by an A-list BloggerWhen Bob the bellhop from Bolivia mentions you on Twitter, a small handful of people will see it. That’s nice. But if John Lee Dumas, Pat Flynn, or Jeff Goins mentions you on Twitter, a small army will see it. That’s even better. When you’re mentioned or followed by an A-lister, it means much more than a small bump in traffic. It means you’ve made it onto the radar of someone with influence.
How to Connect with Influencers
What to Do Next
Just as a couple should keep wooing each other even after they’re married, you should continue doing the things which caused the A-list bloggers to notice you in the first place.
Keep sharing their content. Keep leaving comments. Keep engaging with them. #15. Hitting Your First 1,000 Email SubscribersNow we’re talking. Around the time you hit the 1,000 subscriber mark, your emails begin to carry more weight. You’re able to generate traffic for new posts simply by emailing your subscribers. Even better? You can begin making real money from your blog. As a rule of thumb, you should be able to make at least $1 per subscriber each month — more if you really know what you’re doing.
How to Get Even More Email Subscribers
What to Do Next
It’s time to think about monetizing your blog.
Affiliate programs, sponsored content, digital products, and consulting/coaching sessions are common methods for making money with your blog. And speaking of those last two… #16. Successfully Selling Your First Product or Consulting SessionYou tried your hand at sponsored ads. Maybe you even had a little success with them. But eventually, you aim higher. You decide to offer your skills as a coach or consultant. Or maybe you decide to create your own digital product because you like the idea of unlimited income potential. Whatever the route, the desire is the same: to pad your wallet with twenty dollar bills.
How to Reach This Milestone
What to Do Next
Don’t rest on your laurels.
Once you’ve created your first product or course, create a sales funnel with an email autoresponder series. Then start working on your next product. #17 Reaching 1,000 Visitors a DayWhen you reach 1,000 daily visitors, your blog will be perched at a level many bloggers never see. Your blog has momentum, which means your email list starts to grow on its own. You’re selling more products and services. Your social media shares are increasing too, which is bringing even more new visitors. Your hard work is paying off. “Soon,” you say to yourself before laughing maniacally. “Soon.”
How to Get More Traffic
What to Do Next
Resist the urge to publish more often. Even though you receive traffic bumps on the days you publish, your time will be better spent on promotion.
If anything, scale back on your blogging and focus even more time on promotion. For example: targeted advertising. Facebook, Twitter, LinkedIn, and others offer bloggers the ability to advertise and bring in additional traffic to their sites. #18. Reaching 100,000 Visitors in a MonthWhen you reach 100,000 visitors in a month, you’ve reached a level of success most can only dream of. At this level, practically anything you try can be lucrative.
How to Boost Blog Traffic
What to Do Next
Dig into Google Analytics and learn how to make the most of its data. Discover which topics and posts are performing best, and optimize your blog accordingly. Identify your most important traffic sources, and adjust your outreach efforts.
And if you haven’t started monetizing your blog yet, you’re leaving real money on the table each month. Get started! #19. You Hit 10,000 Email SubscribersAs Jon Morrow likes to say: 10,000 subscribers is the “magic number.” With 10,000 subscribers, publishers beat down your door to give you a book deal. With 10,000 subscribers, you could make a full-time living as a coach or consultant. With 10,000 subscribers, you can easily sell a course you have created. In short, earning a six-figure income from your blog is entirely realistic when you have 10,000 subscribers. It’s arguably the most important blogging milestone.
How to Supercharge Your Email List
What to Do Next
Look for ways to improve your email open rates. It doesn’t matter how big your list is if nobody bothers to read your emails.
As your list grows, and your humble blog starts to look more like a viable business, you may need to trade your email provider for a more sophisticated solution, such as Infusionsoft that can handle e-commerce and relationship management as well. #20. Finally Earning Enough Money to Quit Your Day JobIt’s the dream of most bloggers. Being able to quit your job and blog full-time means you’re able to quit the rat race. It means you can set your own schedule, pursue your passions, and spend more time with your loved ones. It means you’re the boss.
How to Quit Your Job
What to Do Next
Don’t quit your job just yet! Instead, create an exit plan.
Decide what kind of financial buffer you’ll need just in case things get tough. Your buffer will depend on your risk tolerance and personal situation, but a good rule of thumb is three to six months of salary in the bank. Use the time leading up to your departure to ensure your blog is running smoothly by the time you quit. Automate everything you can. Create processes to ensure you can work as efficiently as possible. Because when the paychecks stop, you don’t want any additional drag. #21. Achieving World DominationYou did it. They said it wasn’t possible, but you made it happen. The world is your oyster. You’re the master of your own destiny. And it’s all thanks to your blog. Now it’s time to take a vacation. Maybe even move to paradise. Heck, you earned it. So What’s Your Next Big Blogging Milestone?You realize they’re yours for the taking, right? The niche you want to dominate? The house in the Hamptons? The sharks with frickin’ laser beams attached to their heads? They’re all out there… just waiting for you. They’re waiting for you to decide, “Today is the day I’ll make my dreams come true.” They’re waiting for you to stop reading and start doing. So, don’t just sit there. Work out where you are on the list and what you must do to hit that next big milestone. And let’s do this thing. Because the world isn’t going to rule itself.
About the Author: Five years after first writing this post, Kevin J. Duncan’s dreams of quitting the rat race, blogging full-time, and world domination came true when Jon invited him to join the Smart Blogger team as our Blog Editor.
Never give up, folks. Never, ever give up. The post 21 Blogging Milestones on the Path to World Domination appeared first on Smart Blogger. from https://smartblogger.com/bucket-list/ |
ABOUT MEHello I am Claude 32 years old. I have been doing internet marketing for 7 years and successfully running 3 e-commerce stores. I like to share tips with people aobut online business. Archives
August 2019
Categories |


 RSS Feed
